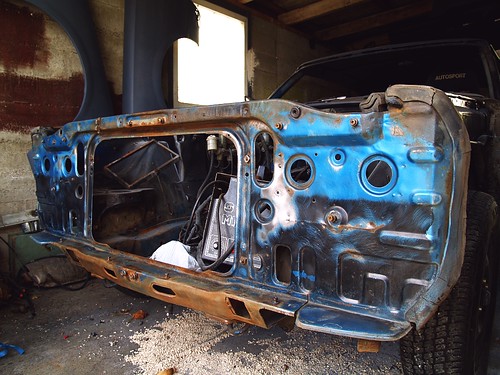
More done today. I started with this front end;
You can see residual over-spray from many effort as well as the surface rust from the chassis section that sits behind the front apron. Thankfully it’s only that and the structure of the car is in very good shape as far as those sections are concerned. I gave it a quick once over with a wire brush and it came up like so…
It needed a little more post that, which I did but then neglected to photograph, no great loss.
One of my pet hates when people paint their cars is them leaving the front section behind the grille body colour, instead of blacking it out. That said, after it was suitably scuffed back, I took to the car with some Hammerite (Satin Black) via a brush. It’s unfinished and despite that, not a pretty finish, however, it’s not see directly at any stage so my only concern is that it’s cleaned up and no dotted in rust. Which I have done. As well as doing both upper sections of the front arch. Which had grime and residue removed before receiving the same treatment. The not quite end result, is as such.
In the arches I’ll likely go over the top of that again with some chassis sealer. Nothing like overkill. Being it was a day of working on parts of the car with little to no serious rust (ie. parts of the car that hadn’t been “repaired” by the previous owner).
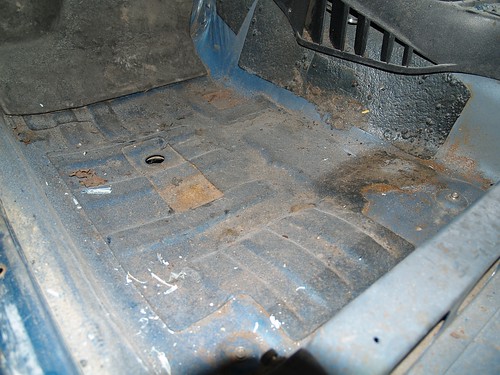
With that drying, I got to work on the inside…. given the state of the rest of the car, I’ve had a few people curious about the state of the floors. Having spent some time underneath the car, I was pretty confident that there were in good shape but you never know what’s lurking under the sound deadening…
Appears to be just a little scratch of surface rust, likely from wet shoes and the like. Given the car hasn’t had front carpet during any stage of my ownership it’s not likely to be from anything else.
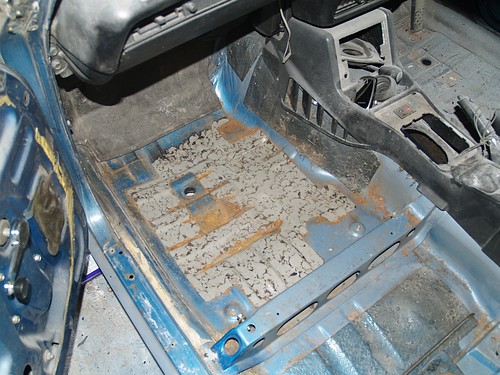
A little while later I was left with this;
A quick wire brush to check the severity;
I have a lot more chipping away to do though. Fun times. I do find it surprisingly satisfying though I think that’s to do with removing a layer of something to find actual metal underneath it and not bog and bodge jobs.
-Michael


Hey dude
Get some dry ice on your underseal then chip it off, or if you have a heat gun use that to peel it off
Yeah man , I’m aware that’s the go but I had nothing there today so just had at it and it all came off surprisingly easy! Likely from being exposed for so long I guess. If it starts getting tricky then I’ll start spending but until then, free + my own labour is not really an issue.